Great news for all you fellow paper lovers!
In a few weeks we will be receiving a big order of new papers. The majority of them will be discounted at $1.50 each per full sized sheet!
We also have tons of really great scrap bundle sets that are priced anywhere from $1.99-$4.99.
These scrap bundles are a great way to get a variety of different decorative papers for those little projects like scrapbooking, card making etc..
Because I get asked fairly often by customers at the store..."What do you do with all these pretty papers?"
I thought i'd include a little project that is fun, quick, easy and a great way to use up your scraps!
DIY Paper beads
1. What you'll need.
Toothpicks. Acrylic Gel Medium (I used Golden's Regular gel gloss.) Mod Podge will also work fine. A ruler. Cutting mat. (not pictured) Scissors and a pen.
Grab an assortment of your favorite decorative papers. This project also works well using magazine pages. Keep in mind that the prints on the paper wont really show on the final product, it's more about the color selection.
2. Draw out your bead shapes.
Using your ruler and a pen, draw vertical lines on the back of your papers, alternating the ruler at a slight angle to create a long triangle shape. The width of the bottom of the triangle shape will wind up being the width of your bead so keep this in mind when mapping out your cutting lines. you can make the width shorter or longer depending on how you want your bead to be shaped. Also, the strips should be at least a foot long,. The length of the paper strip will adjust the thickness of your bead.
2. Cut them out!
Cut your paper where you drew your lines. Your paper should wind up in strips like this. Be sure to use papers that vary in design and color so you wind up with a bunch of bright and unique beads.
3. Roll them up!
Starting with the longest side of your paper strip, begin to roll the paper onto the toothpick as tightly as you can. Once you've rolled it a few times around nice and tight, apply the acrylic gel to the inside of the remaining paper strip like an adhesive and roll it up the rest of the way. When it's completely rolled up it should resemble the picture above.
4. Cover with Gel medium.
Apply a generous amount of Acrylic gel medium all over your bead, making sure to cover to the entire thing.
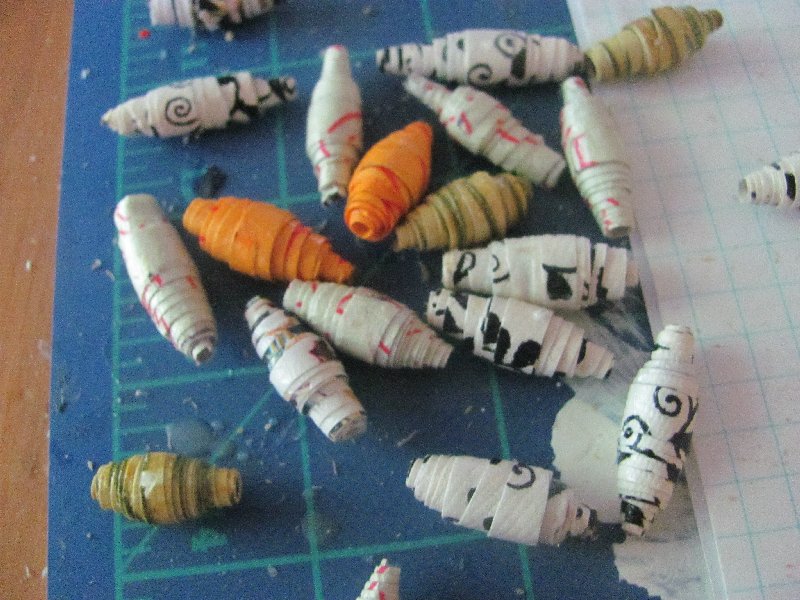
5. Last step!
Pull your paper bead off of the toothpick while it is still wet. Place it in a safe place and allow it to dry!
There you have it!
Once they're dry, they're ready to be strung into a pretty bracelet, necklace, earrings or whatever you'd like to make!
ENJOY!
.jpeg)
.jpeg)
.jpeg)
.jpeg)